

How Often To Change Rear Differential Fluid Acura Mdx
Acura MDX Rear Differential Fluid Change Guide
How to replace the VTM-four fluid in the rear differential of an all cycle drive 1st generation 2001 to 2006 Acura MDX.
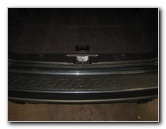
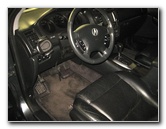
2006 MDX Cargo Area
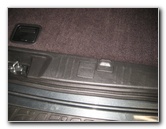
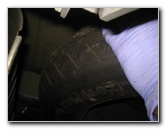
"Spare Tire" Plastic Encompass
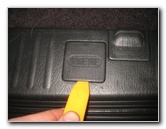
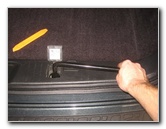
Pry Open "Spare Tire" Flap
Owners of other Acura or Honda vehicles such equally the RDX, ILX, TLX, RLX, TL, CL, RSX, RL, TSX, ZDX, NSX, Integra, Pilot, Accordance, Borough, Fit, Clarity, CR-V, CR-Z, HR-V, Odyssey, Element and Ridgeline may as well find these DIY instructions to be helpful.
The only fluid that can be used is genuine Honda or Acura VTM-4 which is part number 08200-9003 or 08200-9003A.
The replacement crush washer (or "gasket") sizes and part numbers are as follows: Drain Plug 18mm 90471-PX4-000 and Fill up Plug 20mm 94109-20000.
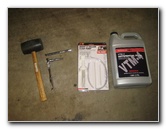
The tools needed to complete the procedure include a small plastic pry bar tool, a 3/8" bulldoze ratchet, a prophylactic mallet, a new automotive fluid pump, a torque wrench and a used oil catch container.
The maintenance schedule for changing the VTM-4 fluid in the rear differential is every 30,000 miles under "normal" driving conditions or every 15,000 miles for "severe" driving such every bit towing, frequent curt stop-and-go trips, mountain driving or driving off road.
Some of the symptoms that point the VTM-4 fluid should be inverse include a judder, shudder, shake or vibration noises from the rear terminate of the SUV while turning. This is acquired by the fluid being contaminated with worn away clutch material.
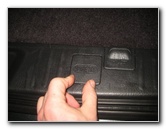
Flip Open Hinged Cover
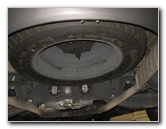
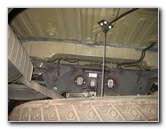
Spare Tire Nether Cargo Expanse
Rotate Counterclockwise
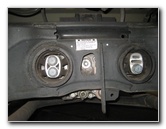
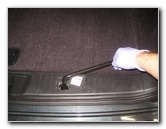
For the easiest access to the rear differential, I recommend lowering the spare tire.
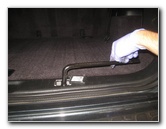
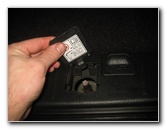
Open the tailgate door for the cargo surface area.
Locate the minor plastic admission cover for the hoist mechanism that lowers and raises the spare spire.
Lift open up the rear border of the cover with a plastic pry bar tool or a flathead screwdriver.
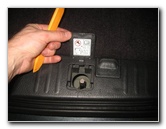
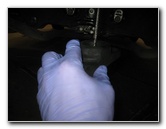
Remove the lug nut wrench (or "tire iron") from the storage compartment on the left side of the plastic cargo expanse panel.
Place the socket on the lug nut wrench over the hoist shaft.
Rotate the tire atomic number 26 in the counterclockwise direction to slowly lower the spare tire.

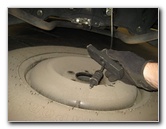
Lower Spare Tire
Pull Out Retaining Cake
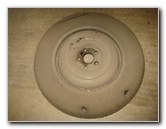
Slide Away Spare Tire
Slide the spare tire over out of the way where you lot won't trip on it.
Now would also be a good time to check the status and air pressure level of the spare tire. If necessary, inflate it to 60 PSI.
(I didn't desire the spare tire cable and block in my style, so I raised it by turning the hoist shaft in the clockwise direction.)
VTM-iv Rear Unequal
Tools, Pump & Fluid
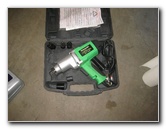
Electric Touch on Wrench
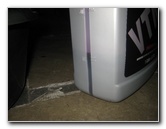
The rear differential's total fluid chapters is 3.0 U.S. quarts. For a drain and fill, the differential requires 2.9 quarts.
So y'all'll only need ane gallon bottle of Honda 08200-9003 VTM-iv fluid. Afterward three rear diff fluid changes, you'll have enough left over fluid to complete the quaternary one. Just be certain to go on the left over fluid in one bottle with the cap tightly sealed.
Slide under the rear of the SUV with the 3/8" ratchet, a rubber mallet, a fluid pump, the used oil grab basin and the gallon jug of VTM-four fluid.
If y'all are unable to loosen the fill and/or bleed plugs that have been over tightened in the past or take corroded from salt water exposure, yous tin use an electric affect wrench with a ane/2" to iii/8" drive socket adapter.
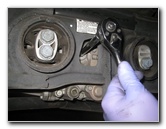
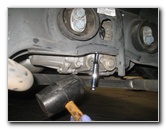
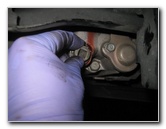
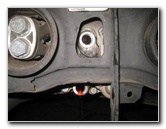
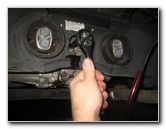
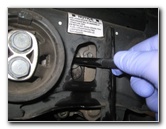
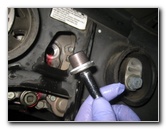
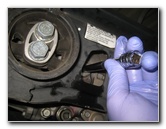
Loosen Fill Bolt Offset
Tap With Rubber Mallet
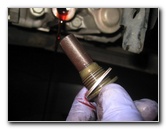
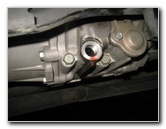
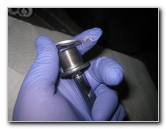
Filler Plug Removed
If you first remove the drain bolt and then are unable to remove the fill up bolt, you won't be able to drive the SUV until the make full commodities can exist removed to supersede the VTM-4 fluid.
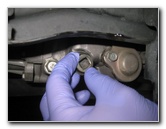
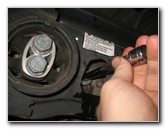
Both the make full and drain bolts accept "square" holes which are to be loosened or tightened with a three/8" bulldoze ratchet.
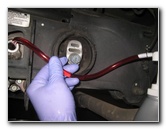
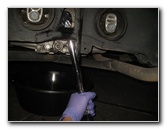
Securely attach the three/8" drive ratchet to the fill bolt. Loosen it in the counterclockwise direction.
If you are unable to loosen the bolt, carefully tap on the cease of the ratchet with a prophylactic mallet while holding the superlative of the ratchet in place.
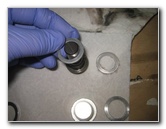
Set up the filler commodities and washer aside in a rubber place. We volition be temporarily re-using the old washer in the future.
Make full Plug & Washer

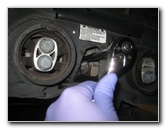
Loosen Drain Plug
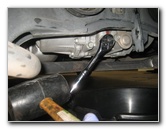
Tap with Rubber Mallet
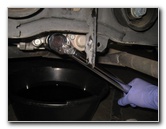
Loosen the drain bolt by turning it counterclockwise with the 3/8" bulldoze ratchet.
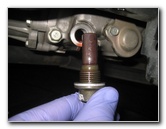
Spin Out Drain Bolt
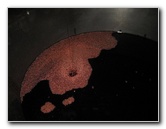
Magnetic Drain Bolt
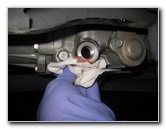
Draining Out Old Fluid
Once it seems like the pressure has decreased, fully remove the drain bolt.
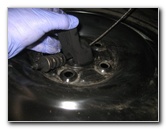
Make full Plug - Bleed Plug
Both Plugs Removed
Draining Out Onetime VTM-four
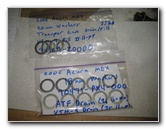
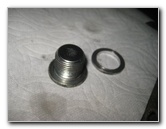
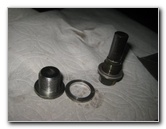
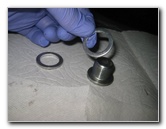
New Washers / Gaskets
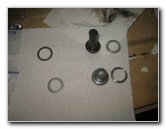
18mm Drain - 20mm Fill up
Replace Bleed Plug Washer
The part numbers are as follows: Drain Plug 18mm 90471-PX4-000 and Fill up Plug 20mm 94109-20000.
Supervene upon the 18mm washer on the drain bolt.
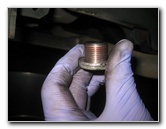
Audit the magnetic shaft on the drain bolt for any metal shavings or other metal droppings. It is normal to come across a lite coating of fine metallic shavings on the magnet.
Clean the drain bolt with a paper towel.
Done Draining Old Fluid
Wipe Area Clean
Clean Magnetic Plug
Spin In Clockwise

Torque Wrench
Torque To 35 lb-ft
Set your torque wrench to 35 lb-ft and tighten the drain bolt.
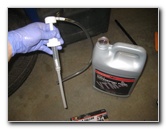
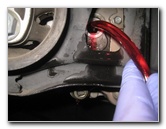
New Car Fluid Pump
Insert Rubber Hose
Pumping In New Fluid
The VTM-4 rear differential is known to be sensitive to fluid contaminations. So avoid re-using an former fluid pump that has been used for the transfer case gear oil or the rear differential on a unlike vehicle.
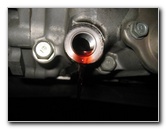
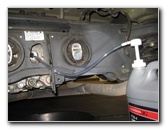
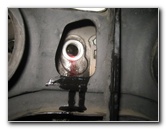
Insert the hose into the filler hole at the top of the differential.
Continue pumping in the new fluid until yous see information technology start dripping out of the filler pigsty.
Fluid Dripping Out - Full
ii.9 Quarts Pumped In
Re-Use Erstwhile Washer
Many DIY'ers choose to replace the fill bolt, drive the vehicle a very short distance and pump in some more than fluid.
Temporarily replace the oil make full bolt with the old washer by turning it in the clockwise management.
Slightly Tighten Fill Plug
Take SUV For Short Drive
Loosen Fill up Plug
Movement any tools, the used oil grab container and other items away from the underside of the SUV.
If y'all placed wheel chocks on the front tires, remove them and release the parking brake.
Accept the SUV for a very short drive such as upwardly and downwards your driveway or effectually the parking lot.
Remove the fill commodities by turning it in the counterclockwise management.
Spin Out Counterclockwise
Pull Off Old Washer
Install New 20mm Washer
Install a new 20mm washer over the make full plug.

Pump In Extra Fluid
Fluid Dribbling Out
Line Up Fill Plug
Y'all should be able to pump in another 8 to 10 pumps.
Spin In Clockwise
Tighten To 35 lb-ft

Double Check Both Bolts
Tighten the fill up bolt to 35 lb-ft of torque.
Double check that both the drain and fill bolts are tight before moving on to the next steps.
Lower Spare Tire Cablevision
Pull Down Retainer Block
Slip Block Through Hole
Slide the retaining cake through the pigsty in the middle of the spare tire.

Rotate Tire Atomic number 26 Clockwise
Raise Spare Tire
Cheque - Spare Tire Secure
Close Hinged Comprehend
Snap In Plastic Cover
If it can be moved, slowly tighten the hoist shaft until the spare tire feels secure.
Swing the hoist shaft admission panel closed and pop it back into place.
Be sure to record the rear differential fluid change in your SUV'south service records.
Have the SUV for a short examination bulldoze with some slow speed turns. Y'all shouldn't exist hearing any strange sounds from the rear of the vehicle.
For more than, please check out all of my 2001-2006 Acura MDX DIY Repair & Maintenance Guides.

Source: https://paulstravelpictures.com/Acura-MDX-Rear-Differential-VTM-4-Fluid-Replacement-Guide/
Posted by: delgadogated1935.blogspot.com
0 Response to "How Often To Change Rear Differential Fluid Acura Mdx"
Post a Comment