

How To Change Project Settings In Final Cut Pro
How to Set and Change Project Settings in Concluding Cut Pro
![]() Projection settings, which Apple calls "Project Backdrop" determine the technical specs of your project. In this tutorial, I explicate what they are, how to set them and how to change them. More than importantly, I explain what can't be inverse.
Projection settings, which Apple calls "Project Backdrop" determine the technical specs of your project. In this tutorial, I explicate what they are, how to set them and how to change them. More than importantly, I explain what can't be inverse.
NOTES:
- Here's a tutorial on how to alter Library Backdrop.
- Hither'southward a tutorial on how to consolidate media within a library.
BACKGROUND

The Project Properties dialog appears whenever you create a new project. It determines, among other things, the frame size, frame charge per unit, return codec and color space of a project.
Note: The shortcut to create a new projection is: Cmd + N.
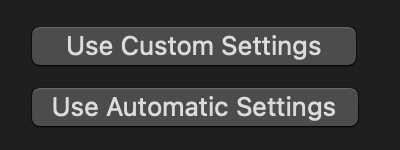
There are two setup options: Automatic and Custom. However determining which you lot are using is a bit astern. When Use Custom Settings is displayed, you are in Automated manner. When Apply Automatic Settings is displayed, y'all are in Custom way. Automatic way displays fewer options.
USING Automated SETTINGS
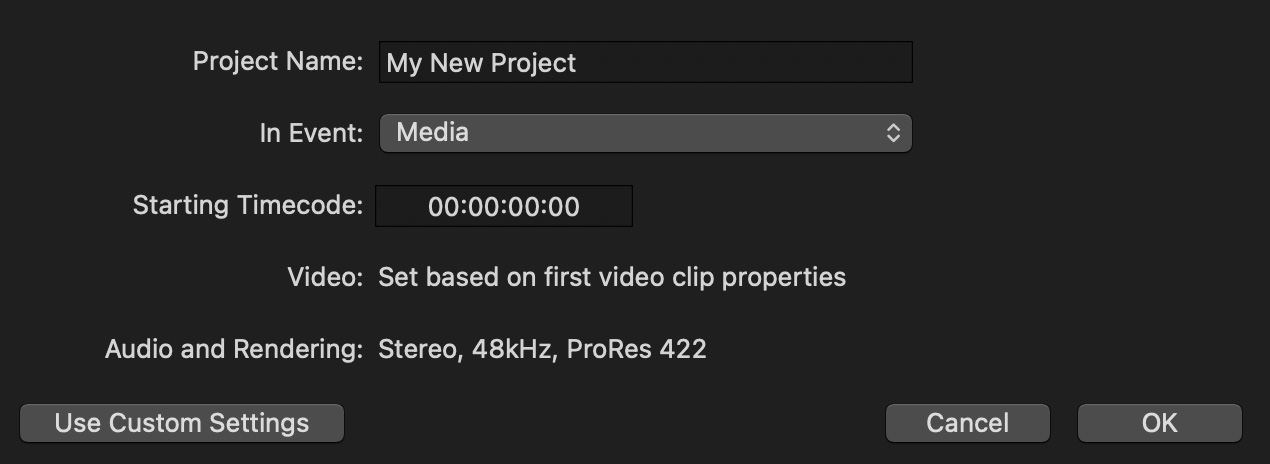
When yous create a new project using the Automatic settings, you can:
- Name the projection
- Determine in which upshot to shop it
- Change the starting timecode
When you click OK, the projection is created.
At present, here is the KEY betoken: The project volition automatically configure itself to match the technical settings of the Get-go clip y'all edit into the timeline; this includes setting:
- Frame size
- Frame charge per unit
- Color space
- Rendering generally defaults to ProRes 422
The reason this is important is that if your first clip is not the format y'all need, you'll need to modify these settings later on, which I'll cover shortly. However, one time media is in the timeline, the frame rate can not be changed. So it is important to be sure you edit a clip with the correct frame rate as your first timeline clip.
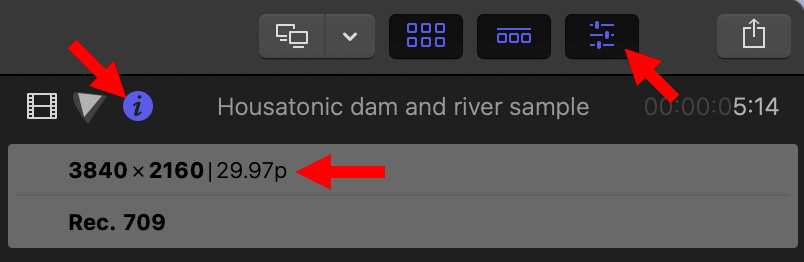
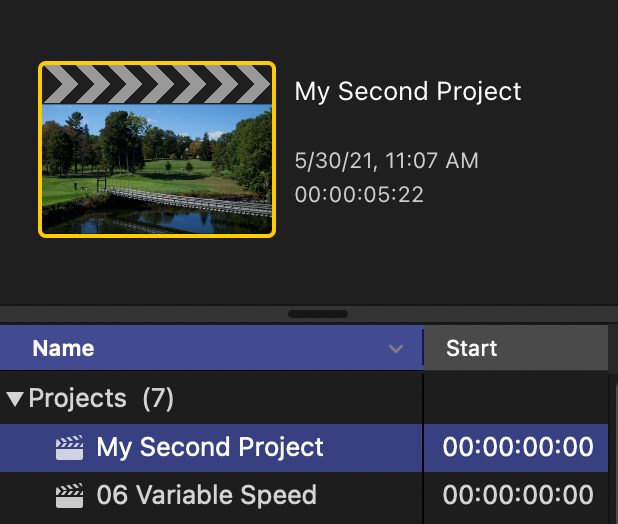
You can see what your project specs are by clicking within the timeline, only not on a clip, to select the timeline pane, then wait at the height of the Info Inspector (left red pointer).
As you tin see in the screen shot above, this is a 4K UHD 29.97 fps project (lower carmine arrow), using the Rec. 709 colour space. This is a fast and easy style to make sure your projection is configured the manner you expect.
USING CUSTOM SETTINGS
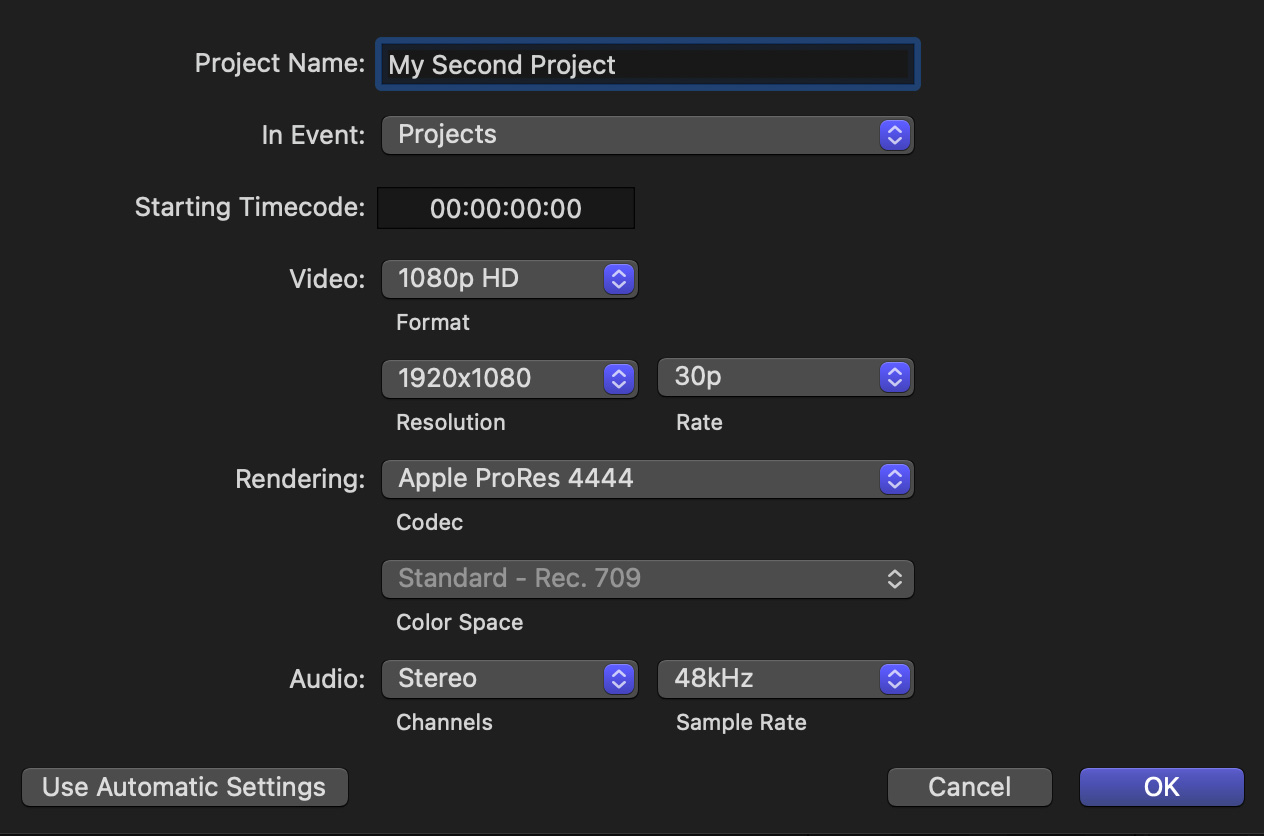
Custom settings allow united states of america to specifically determine the specs of our project, regardless of the first clip we edit into it. This requires more than understanding of media formats, just prevents surprises at the end, such as creating a project with the wrong frame size or frame rate.
NOTE: One time y'all prepare custom properties, Concluding Cut will not change project settings, regardless of the prune yous edit into the timeline first.
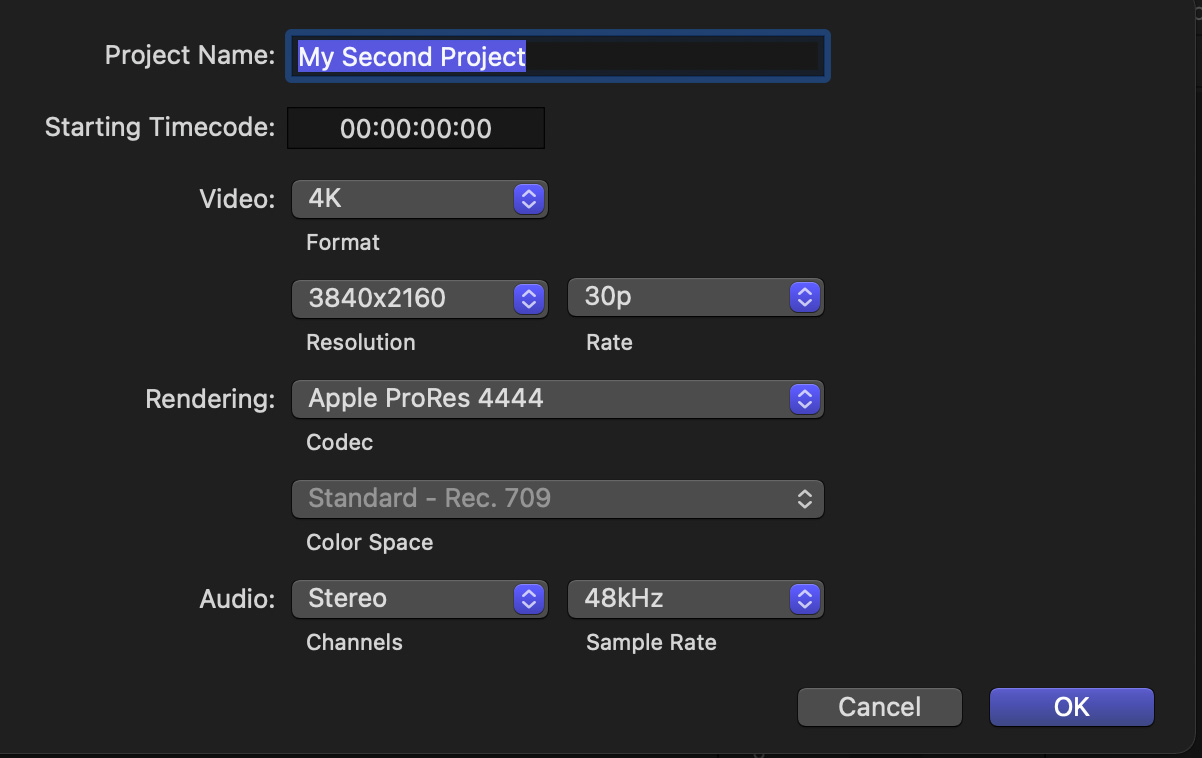
Looking at the screen shot above:
- Starting timecode. This determines the timecode of the projection. The default (00:00:00:00) is fine for the spider web. 01:00:00:00 is commonly used for North America broadcast and cablevision, while ten:00:00:00 is normal for European broadcast and cable. Y'all can alter projection timecode at any time with no problems.
- Video Format. This determines the frame size of the finished projection. Custom allows creating non-standard frame sizes. Final Cut can hands edit projects of whatsoever frame size, even non-standard, non-circulate sizes.
- Video Resolution. Normally, this matches Video Format. However, several formats, such as NTSC SD and 1080i have multiple frame sizes associated with the format. For the web, progressive formats (indicated by the letter "p") are best.
- Video Rate. This determines the frame rate of your projection. Of all settings, this is the most disquisitional. Why? Because we can't change it later media is edited into the timeline. Final Cut actually edits past counting frames, which is why nosotros can change project timecode without damage. Irresolute the frame rate would alter every edit, which is why FCP won't allow it.
NOTE: There is a workaround. Select all media in the timeline and cut information technology to the clipboard. Change the frame rate, and then paste the media back in. In many cases, this will piece of work.
- Rendering. This determines the codec used for all render files, and acts as the default setting when sharing a projection during export. For projects shot with almost cameras, ProRes 422 is an excellent choice. For projects shot using RAW, Log-C or HDR media, employ ProRes 4444. For projects that originate on the computer, for example, my weekly webinars, use ProRes 4444. If your project was recorded in ProRes 422 HQ, utilize that codec.
- Color Space. This defaults to Standard – Rec. 709, unless you take changed your Library settings to support Wide Gamut colour. For non-HDR media, Rec. 709 is fine.
- Sound. This determines the audio format of the project and the default output format when exporting. Stereo 48K is the default and an excellent option; with a frequency response that exceeds normal man hearing.
Click OK to accept these changes.
MAKING CHANGES
While nosotros can't change frame rate after we start editing, nosotros can modify everything else. The fox is in knowing where.
Select the projection proper name in the Browser.
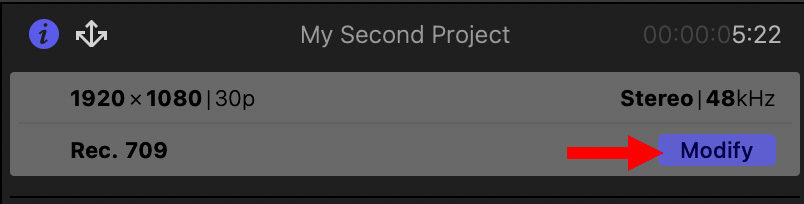
Type Cmd + J (or open the Inspector). At the meridian is a blue Modify button. Click it.
This re-opens the Project Properties pane, where you lot can change whatever you need – except for frame rate.
Click OK and Last Cut resets everything instantly, including resizing media, if necessary.
Most of the time in my piece of work, I ready my project settings at the start and go out them alone. Only, when I'grand teaching, I'm frequently changing settings to explain media concepts to students. Final Cut is happy either way.
EXTRA CREDIT
Here'due south a video tutorial on how to adjust Library settings.
Bookmark the permalink.
Larry Recommends:
![]()
NEW & Updated!
Edit smarter with Larry'due south latest training, all bachelor in our store.
Access over 1,900 on-need video editing courses. Go a member of our Video Training Library today!
Bring together NOW
Subscribe to Larry's FREE weekly newsletter and save 10%
on your beginning purchase.
Source: https://larryjordan.com/articles/how-to-set-and-change-project-settings-in-final-cut-pro/
Posted by: delgadogated1935.blogspot.com
0 Response to "How To Change Project Settings In Final Cut Pro"
Post a Comment